Health & Fitness
Learn Yoga: Yoga Warrior Sequence - Warrior III
Learn Yoga: Yoga Warrior Sequence - Warrior III
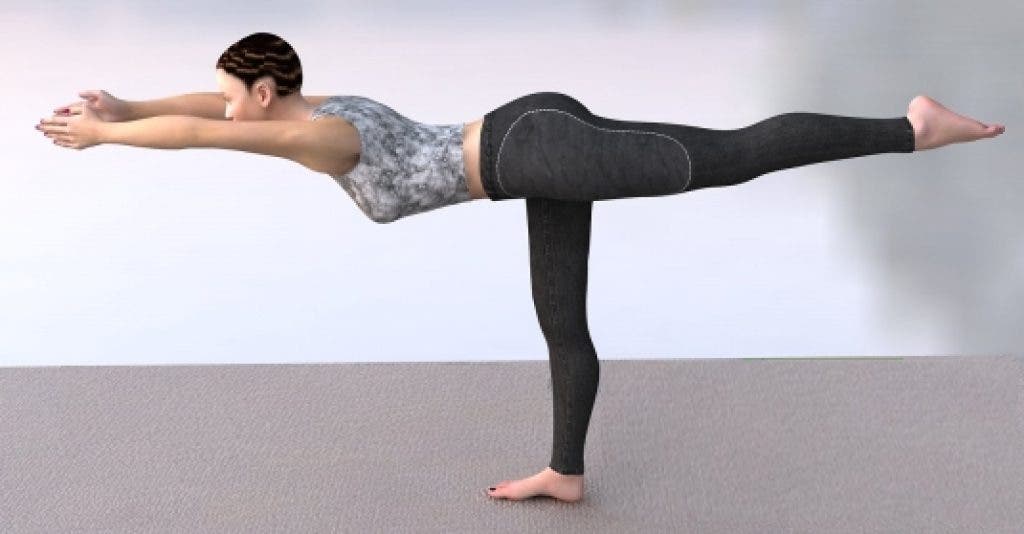
I would like to continue with the Yoga Warrior Sequence. Today's pose is a Warrior III- Virabhadrasana III.
Warrior III Benefits:
- Strengthens the ankles and legs
- Strengthens the shoulders and muscles of the back
- Tones the abdomen
- Improves balance and posture
There are many ways of getting to this pose. This is the one I like.
Find out what's happening in Gaithersburgwith free, real-time updates from Patch.
Step by Step Recomendations from Yoga Journal:
1. Stand in Tadasana, exhale and fold foward to Uttasana. From Uttanasana, exhale and step your left foot back into a high lunge position. Your right knee should be more or less at a right angle. Lay the midline of your torso (from the pubis to the sternum) down on the midline of the right thigh (from the knee to the hip crease) and bring your hands to your right knee, right hand to the outer knee, left hand to the inner. Squeeze the knee with your hands, lift your torso slightly, and with an exhalation, turn it slightly to the right.
Find out what's happening in Gaithersburgwith free, real-time updates from Patch.
2. Now from the lunge position, stretch your arms forward, parallel to the floor and parallel to each other, palms facing each other. Exhale and press the head of the right thighbone back and press the heel actively into the floor. Synchronize the straightening of the front leg and the lifting of the back leg. As you lift the back leg, resist by pressing the tailbone into the pelvis.
3. Normally students come up into Virabhadrasana III by lunging the torso forward. This tends to shift the body weight onto the ball of the front foot and unbalance the position. Don't allow the torso to swing forward as you move into position; instead, as you straighten the front knee, think of pressing the head of the thighbone back. This centers the femur in the hip joint, grounds the heel into the floor, and stabilizes the position.
4. The arms, torso, and raised leg should be positioned relatively parallel to the floor. For many students the pelvis tends to tilt. Release the hip [of the raised leg] toward the floor until the two hip points are even and parallel to the floor. Energize the back leg and extend it strongly toward the wall behind you; reach just as actively in the opposite direction with the arms. Bring the head up slightly and look forward, but be sure not to compress the back of your neck.
5. Stay in this position for 30 seconds to a minute. Release back to the lunge on an exhalation. Bring your hands to the floor on either side of the right foot, and on an exhalation, step your left foot forward to meet your right. Stay in this forward bend for a few breaths, then repeat for the same length of time on the other side.
______________________________________________________
If you have any questions, please contact me. I am teaching at ProFITness Club in Old Town Gaithersburg http://profitclubmd.com
Starting June - Gentle Yoga practices will be moved to Saturdays at 10am. The regular yoga- stays on Tuesdays 7:15 pm.